Showing posts with label HMS Unicorn. Show all posts

Tuesday, April 29, 2014

HMS Unicorn Build Log 15 - Belfry Making

Belfry Making

I've lost track of my updates since some photos of mine are missing... =.= So, I'll just upload part by part. Up till now, I've basically done the forecastle fittings including the catheads.  

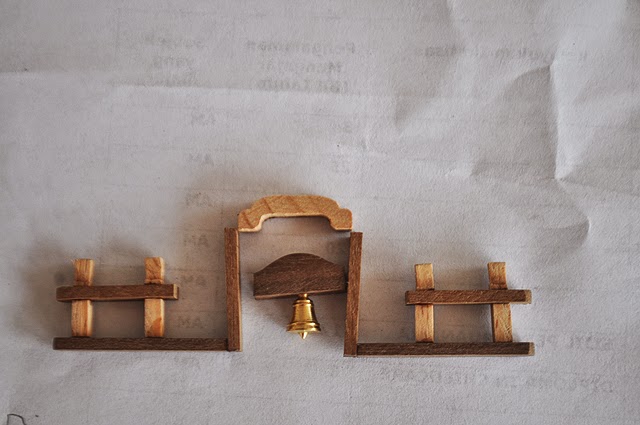
Anyway, this is how I make my belfry. I used the beech woods for the bits that came with the kit and 2mm x 5mm walnut strip for the rail. To produce the bits, I mill them with a reverse milling bit to create the head, and then cut them into half.


I really don't like the color of the beech wood, but since I'm gonna paint them any wood will do.


For the crown on the belfry, I cut the original one into 5mm width to ease my work.


The rail..


For the headstock, I used the 6mm x 5mm walnut strip which is the same as the cat head.


And I added a copper piece on the head stock.


Install the bell and Done. ;)


Thanks for viewing :)

Thursday, February 6, 2014

HMS Unicorn Build Log 14 - Cannon Rigging

Cannon Rigging

Well, after a week of Chinese New Year celebration, and another week before it as preparation, I finally can sit down here and make some updates.

Corel doesn't provide a clear instruction on the cannon rigging, and even the rigging blocks are not coming in correct size. Purchasing them will be really out of my budget, while making 80 of them sounds bit crazy for me, so I decided to make a easier version.

I first made me a jig for the rigging before putting them to the deck. The horizontal line marks the level of the eye bolt on the bulwark.


I started the first one on top of the jig as here gives a larger space for me to work on.


After making the first knot, I applied glue to secure it before rigging it down.


After this, I transferred it down and did the same on the other one.


Done.

On the deck. :) From this picture, you can see that I've also added the the waterway and rail, I'll make the update as soon as possible. :)


Thanks for viewing. :)

Tuesday, January 21, 2014

HMS Unicorn Build Log 13 - Cap Square Making

Cap Square Making

Finally, I got sometime on my update after such a long while. This is done like 2 weeks ago, and now I'm slowly putting up my works here... :)

I started working on it once my copper sheet arrived, and also made a jig to help on. Here's it is. 


I cut a 2mm strip from it.


 And with the aid of my jig to create the curve on it.


To save time, I made them only for those exposing on the deck. Total of 20 guns, so 40 cap square.

I also added nail detail to it, and continued to blacken. :)


Thanks for viewing. ;)

Monday, December 23, 2013

HMS Unicorn Build Log 12 - Rudder & Deck Modification

Rudder & Deck Modification

Some quick updates of recent works.
I've done the rudder together with its hinges over the weekends, and also the painting. :)


Due to my silly mistake on the hull planking, I had to widen the hinges so that they can fit to the hull. Pictures below show the thicker hull compared to the rudder. I'm also planning to add rudder chain to it, but that'll need to wait till my stern gallery to complete. ;)


For the deck, I've decided to remove the gangways following the structure like the H.M.S. Pegasus. I also had some times to put some planking on, and cut the skylight portion off. :)


Thanks for viewing. :)

Wednesday, December 11, 2013

HMS Unicorn Build Log 9 - Bulwark Planking & Gratings

Bulwark Planking & Gratings

If referring to the HMS Unicorn (1824), the bulwark is painted to ocher green. But, since I don't have any green paint currently, I decided to paint them to red.


I did some sanding and tapering on the lowest plank to meet the deck's level, and pre-cut those wood strips between gun ports.


After the planking is done, I repainted them for a better finish. From the picture below, you can see that the beams are actually done too. Corel suggests to use the kit provided birch wood strip (4mm x 4mm), but instead, I used balsa. Birch strips are too nice for beam. :D


Then I started to drill holes for the eye bolts. I used an unused piece of plywood for more precise distance marking from the gun port. 


Done! And you can also see that the remaining deck planking is done too. :)


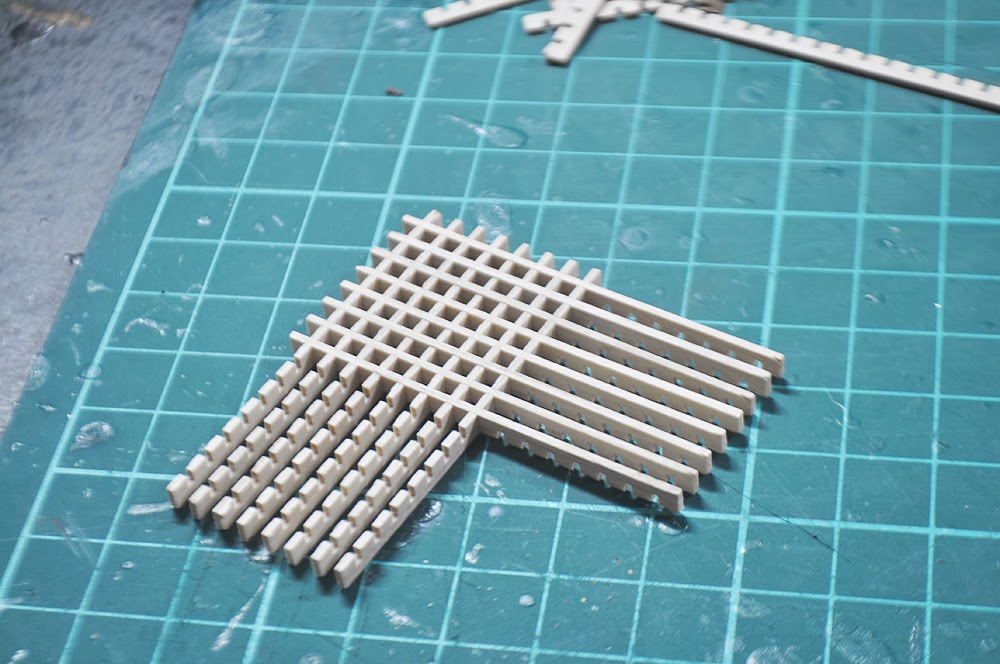
I continued to the gratings making on the same day. Gratings that provided by Corel is real bad in quality, so I purchased OcCre ones to replace them from CMB.


For the surrounds, I used 2mm x 3mm wood strips.


This is how my deck looks like now with gratings and ladder on. :) Also, treenails detail are added. I'm using the same technique as my Race Horse, which is chalked by using a mechanical pencil. :)


Thanks for viewing. :)

Tuesday, November 19, 2013

HMS Unicorn Build Log 7 - Hull Painting

Hull Painting

The whole painting process has been uncertain, and it ends up to a result not even close to my previous planning. :P

After a real lot of times of painting and sanding and painting and sanding and painting and sanding, this is what I end up to.. An 1824 HMS Unicorn colour scheme. :)


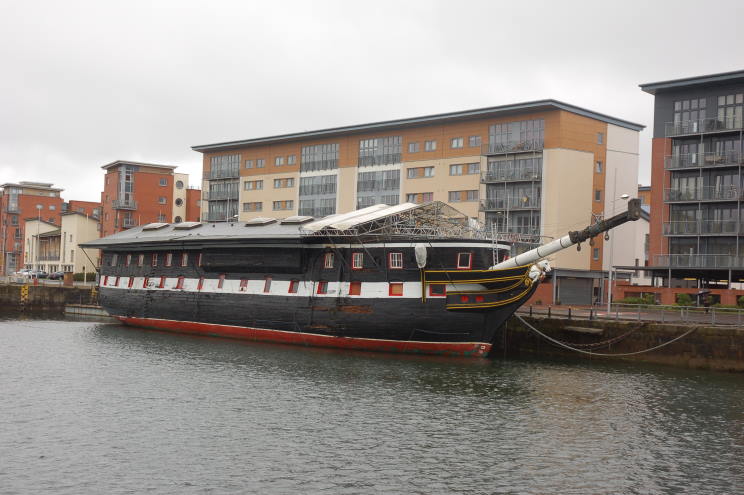
Comparing to the real ship.. which is quite close to USS Constitution and HMS Trincomalee also :)


I always think that showing the natural wood colour will be best for this ship, but due to my hull planking mistakes I'll really need to use dark colour to cover those errors.

Here shows the progress:
Hull is painted to white as previously planned. Around 6-7 layers are applied.


A thick black wale is added by using 4 x 4mm black wood strips, and the 'nose' is painted to black too. Anyway, when I wanted to paint the gun port area, the paint that I bought couldn't paste on the wood equally, and caused all the clouds and prints all over the area. I sanded and repainted, but still return the same result. So, I thought of changing a colour scheme... :( 


I found that the 1846 HMS Unicorn would be nice to follow too, so I started to work it out on port side. I started by extending the wale area, so that it's touching the waterline; and narrowed the gun port area down to the height of gun port.


Here's how it turned out. At this point, I still couldn't get a good mix of red ocher.


Two-face :P

I searched through my store room, and thank God there is still a unopened of red ocher paint in it :) I applied 2 layers on it.


When I was think about what modification should I do to the bow, I found another inaccurate plan about this kit. The bow that showing on the box is different from the instruction plan. As you can see, there are actually 2 gun port lids instead of the ladders. I'm currently planning to follow this one. :) 


Anyway, after long hours and days of working on the colour scheme... I've finally done it. Although it's not the scheme that I love the most, but the result is still satisfying for me.


I will continue on the beakhead and stern modification next. :)

Thanks for viewing. ^^