Finally my long waited LEDs have arrived, here it is!!!
 |
| LED Earrings |
They are actually LED earrings, and I just love the colour of the light!! I chose to use earrings as my cabin's lighting because they are small, easy to switch on/off, and most importantly I can save a lot of my time on wiring! I think it's really practical on smaller ship or cabin like my Race Horse, and cost effective. They cost me only USD$3.30! :)
Before I even purchase the LED earrings, I've already thought of using barrels to 'hide' the battery. I've also added barrel holder, as shown:
 |
| Barrel Holder |
I was sitting on my working place, and staring at my ship, thinking a way to switch on the light from the deck.. and I've finally came up with this..
 |
| 'Holder Pin' to Help Switching on from Deck |
I added a 'holder pin' that will pin through a barrel on the poop deck, so that it can be switched on by just moving the barrel. Like this:
 |
| Pin Through Poop Deck |
The barrel holder is not glued to the deck, so that it can move freely to switch on the LED. And a hole is drilled on a barrel to hold the pin.
 |
| Hole to Hold Pin |
Push the pin in, and they are a switch. :) This whole thing can be taken out anytime, so that one day when the battery dries off they are still changeable. Only if the LED gone, then it is gone.
 |
| Camouflage Switch |
Meanwhile, the LED is set through the sash of the door in the cabin, and glued to hold its position tight.
 |
| Big Diamond in the Cabin :P |
A secure pin is also added to 'lock' the LED still.
 |
| Earring Pin Through the Sash of the Door |
So, it's how it looks like now :)
OK, I know the capstan and the barrels are too close together :P But there's no way I can put my switch elsewhere. :D
 |
| Poop Deck Full Fittings |
Here's the result when the light is on. :) Yea, the switch is so sensitive until it seems like the barrels are not even moved!
 |
| Light On |
After the poop deck is done, I can finally glue everything on deck in place. Since I took out my bombard shots for photo shooting last time and did not seal them back, they have already rusted.
To solve it, I 're-blacken' them using my metal blackener. Surprisingly, it gave a better result! The surface became rougher, instead of shiny looks before! :)
To solve it, I 're-blacken' them using my metal blackener. Surprisingly, it gave a better result! The surface became rougher, instead of shiny looks before! :)
 |
| Bombard Shot After Re-blackening |
To give a darker view, I coated with a layer of tyre shine.
 |
| Coated with Tyre Shine |
And when I'm too bored... :P
My 'Bomb-bell-shots Droid'... weirdo name.. LOL
 |
| 'Bomb-bell-shots Droid' |
Pin racks are on too.
 |
| Pin Racks On |
Leftover shots stacked up.
 |
| Leftover Shots Stacked Up |
Well, the manual doesn't design ladders to the poop deck from the quarter, but I think it's better to have. Since I don't have enough pre-cut ladder left, I glued the other side directly on the bulwark. Like this:
 |
| 2 Ladders Added |
Now, with all the tritium vials left unused, I really have to come up with more ideas to utilise them! Since I've 2 bigger ones (1.5mm * 12mm), I will use one of them as poop deck lamp.
Using back the same technique as I did last time on smaller lamps, I've came up with this.
Using back the same technique as I did last time on smaller lamps, I've came up with this.
 |
| Poop Lamp Design |
And sprayed it to gold colour.
 |
| Completed Lamp |
In position. :)
Here's a good comparison on the brightness of a normal LED light and tritium vial. In light presence condition, you just can't see the tritium light. It's just a luminant body after all.
Here's a good comparison on the brightness of a normal LED light and tritium vial. In light presence condition, you just can't see the tritium light. It's just a luminant body after all.
 |
| Lamp In Position |
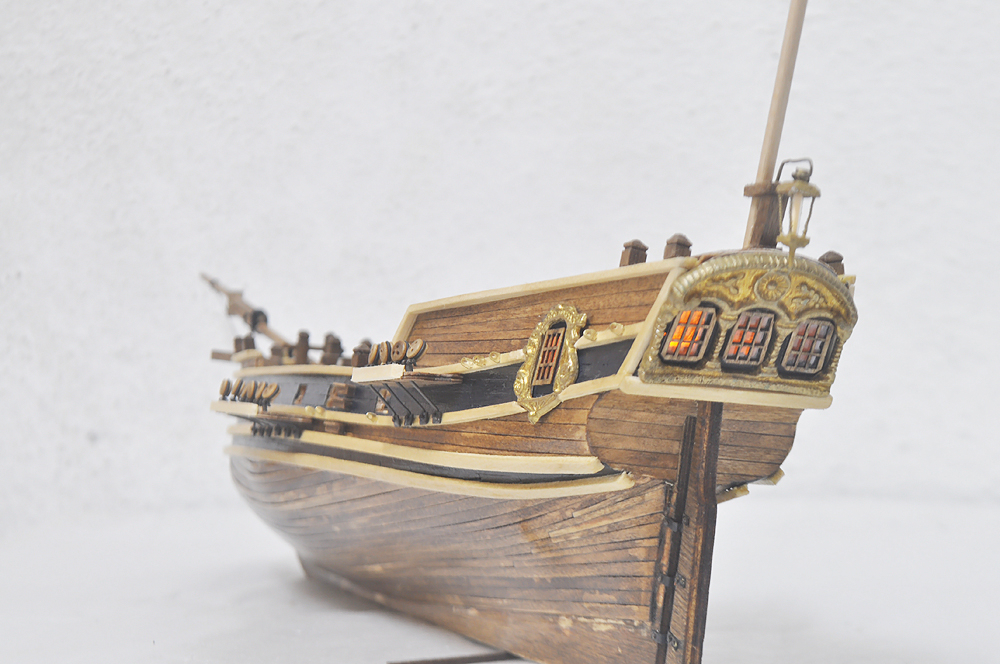 |
| Stern View |

-End of Day 30-
No comments:
Post a Comment