Showing posts with label captain's cabin. Show all posts

Wednesday, October 9, 2013

HMS Unicorn Build Log 3 - Stern Modification

Stern Modification

Like what I've done on my previous ship, I'm again taking the challenge. :) I'm going to make a Captain's Cabin with furniture in it, and they can be seeing through the windows of the gallery and the skylight on upper gun deck.

Skylight As Provided by Corel

Picture above shows how the kit provided skylight looks like. I'm gonna extend it to the shots garland, making the skylight in long rectangular shape, so that there will be more angle to view the cabin from the deck. :)

So, it will be around in such length:

New Skylight Location

Hope you can see the marking... :P 
Another few modification to make are the bulkheads and keel that blocking the view to the cabin. Picture below shows how the overall modification roughly looks like:

Stern Modification Draft

So, as you can see.. The blue box indicates where the cabin should take place; and the yellow line shows where the skylight roughly is; while the shaded red area will be the keel part and bulkhead (middle) to be cutoff. The 'stern block' that I'm holding is provided by the kit, and that will use to hold the last 2 bulkheads together. :)

I started it with the keel...

Modified Keel

And then the bulkheads... 

Bulkhead 16

With the whole upper piece cut off, the hull planks will no have guide from this bulkhead.. so, they will be on 'their own way' to the next (last) bulkhead. :) The little piece of board glued on will be the support of themselves.
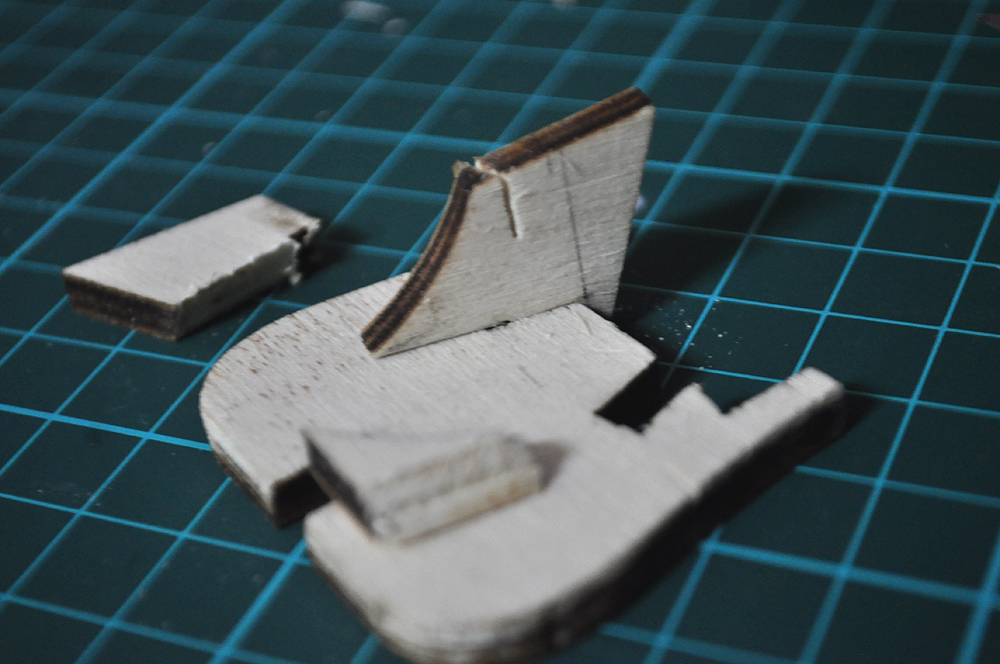
Stern Block Glued

'Stern block' glued in place...

New Stern Piece

Bulkhead 17 glued on...
There should be actually 'holes' for the windows on BH17, but I haven't cut them off because I still need to border of it to guide the hull planks. 

Modified Stern

Finally, the whole piece is now in place... it's not accurately fit according to the kit's plan, slightly lower I think. Anyway, it shouldn't affect that much.. will just need to check from the stern whether the hull curve coming correctly.

Fillers

I've then sanded the keel a bit lower and added all these UGLY looking filler to it.. :D And then, a big checker carpet to cover them :P

Checker Carpet

Hate the wrinkles... haha
Might change a new 'carpet' in the future. As long as the upper deck is not fitted on, it'll be still good to change. 

I really love the big space of the cabin. It really gives me a lot of space to design my furniture. Anyway, it's still a long time to go... I'll start all the fittings only when the hull planking is done.

Thanks for viewing!! :)

Saturday, April 20, 2013

HMS Race Horse Build Log - Day 4

Day 4 - 5 Hours Work

As mentioned in the previous day, the cabin sits between bulkhead #10 and #11 where there's very limited space for me to design it. I drew plan to make sure everything sits right:
Draft on Captain's Cabin

So, I've only 49mm * 25mm of space for me to include everything into the cabin!!! This is going to be very challenging!! :D 

I started with the table first. Since I still kept all leftover wood pieces of my Black Pearl making, it makes my work easier... 

Table

No big issue on making this.. around 20mm * 8mm.
And then, the chair..

The Chair, Tiniest Among All

Making the chair is the hardest part. To make sure all these furnitures looks in ratio, the chair's seat needs to be only at 4mm * 4mm, and its legs at 1mm * 1mm!! The tiniest wood strips I have is only 1mm * 2mm, in which I'll have to cut them in two!! It took me around 30 minutes to complete this, after breaking few wood strips..

The Map!

Scroll Dip with Coffee to Give Vintage Effect

I've also made a map (ok, just a paper.. :P) to fill the table. In order to give it a vintage effect, I added some flavours on it :D 
I canceled my cabinet planning, and replaced it with a mirror. This idea came out when I was eating snack for my breakfast, which the inside of plastic bag is a good reflective body. :)

Mirror with Stands Using Previous Ship's Material

The stands are the leftover pinrail material from the Black Pearl, which I think suitable for this too. 

To fill up the big empty space on the port side, I added another pole hanger. It is made by using one copper nail as its pole, and copper rings as the hangers. It really took me sometimes to glue the hangers on the pole...
Pole Hanger Beside the Table

For the bed.. Too sad that I've forgotten to take photo on its progress..

It's done by using a 4mm thick wood piece, and few small pieces to tissue papers. I put a folded tissue beneath first, to make a 'bulge' effect, and then only 'wrapped' the whole thing up as a bed sheet. 

For the pillow, I cut out a long 'tissue-strip' and wrap it up at one end of a wood strip. Glued it, and then cut off the end of the strip. :)
Captain's Cabin As Seen to Stern Side

Take a close look, and you'll see a pen in a container on the table. :) The container is made by a spanker bead from my Black Pearl; while the pen is made by a refill of mechanical pencil! :) And yes, I made another chair to fill up the space! 
Captain's Cabin As Seen From Stern Side

Now left only a door to complete.. 

It's done by using the removed part from the half deck.. I added planks on it, and drilled a hole as sash of door, and then a nail as door knob! :)
Door to Captain's Cabin

So, it's how it looks like now!!! ^^
The Captain's Cabin


- End of Day 4 -


HMS Race Horse Build Log - Day 3

Day 3 - 6 Hours Work

Before I started Race Horse building, I've been thinking of making the interior of Captain's Cabin. So, I searched through the net to find one good example.. and here it is!!

The Interior of Captain's Cabin

Of course that's no way that I can make such complex cabin, this is just for a reference!! :) After few hours of planning and 'filtering', I've decided to add at least a table, a chair, a bed and a cabinet in my cabin.. 

Here's the plan!! 
Draft on Making Cabin

The red shaded area are region that need to be cut off. Part between bulkhead #10 and #11 will be the cabin; while part between #11 and #12 will an empty space between the cabin and the stern window.   

Window between Bulkhead #10 and #11

Comparing to the full scale plan, you can see that there'll be a window at both sides. This part will not have major issue. Planking is added on bulkhead #10 and #11 to give more detail view.
Planking on Bulkhead #10

Now, the stern window part.. which is much more difficult to handle. The reason I remove the area on #13 is because they are blocking the view from the stern window. However, if they are removed, it will cause minimum area for me to apply glue on it, which makes me no way to hold #12!
Removing Shaded Region of  #13

Now you can see how small is that area to hold #12. To solve it, I'll need to make another wood piece increase the surface to stick on #12.
Extra Wood used to hold #12

This extra wood will be placed between the tips of #13. Note that planking is already done also.
Holding Firm

#12 On Position


DONE!!! 
Anyway, #12 is actually temporary!! Because there is no 'holes' to allow people to see through it. I haven't had a clear plan on it yet, maybe I'll need to drill a 3 big holes on it; or I'll directly put the cast metal on! The purpose to put #12 on position temporarily is to give body planking a set point.

However, there's another issue here... the cast metal stern window doesn't fit perfectly! I have currently no idea on solving this. Anyway, I think that the double planking will cover that empty part. Let's put it aside first.
This Is So Not Good

So, after all these planning and cutting I can finally put my bulkhead on!! To make sure they are perpendicular to the keel direction, always use a 'right' rectangular object to help. In my case, I used a rubik's cube pieces. :)
Rubik's Cube Pieces to Help Positioning Bulkheads

After everything set, put the half deck bars in.. and they should in perfect position. :) 

All Bulkheads in Position

I actually checked again with decks inserted on, but didn't take picture. Anyway, there are many ways to check whether the ship is straight. :)
Check Whether It's Straight


- End of Day 3 -